Friday, February 28, 2014

Honey Glazed Tarragon Chicken and Gravy (Freezer/Batch Recipe)

Honey glazed tarragon chicken is a great meal to have stocked in your freezer for a quick and easy meal.  In just about the time it takes to warm through, dinner is ready.  You can serve this chicken and gravy over rice or noodles or for an even quicker and easier meal, over toasted bread for a hot open face sandwich.  Add a side vegetable (you always have frozen veggies on hand, right?) and dinner is served!


Honey Glazed Tarragon Chicken

The recipe below makes 4 servings but its easy to make up a big batch for the freezer.

1 pound bone-in chicken breast, skin removed
1 tsp dried tarragon leaves or 1 tbsp chopped fresh tarragon
1 tsp chicken base or 1 chicken bullion cube
1/4 cup honey
3 tbsp flour
1 cup water
Salt and pepper to taste

  1. Season the chicken with salt, pepper and tarragon and cook the chicken until done.  You can bake the chicken in a covered baking dish or you can use a pressure cooker.  Follow all the manufacturers directions when using a pressure cooker.  Once the chicken is cooked, remove it to a dish to cool.  Reserve all the cooking liquids.  When cool enough to handle, remove the bones and break the chicken meat into chunks.
  2. Add the chicken, chicken base and the honey to the reserved cooking liquid.
    1. Cool, package and freeze the chicken with the cooking liquid.  Be sure to label, date and include the remaining instructions for finishing the recipe
  3. Bring the chicken and liquid to a simmer in a large saucepan.  Make a slurry of the flour and water and add it to the saucepan while stirring continually.  Simmer for 5 minutes more until the gravy is thickened and everything is warmed through.
  4. Serve over rice, noodles or toasted bread. 


Wednesday, February 26, 2014

Daisy Bonnet Crochet Pattern

Its been snowing nearly everyday and everyone is sick of the winter weather.  Soon enough spring will arrive and all the flowers will be blooming.  If you can't wait for the real flowers, the cheerful daisy on this bonnet may help.  I made this bonnet in the bright funky colors of a gerbera daisy but you could make the petals white for the classic shasta daisy.

This pattern uses US crochet terms.  If you have any questions, leave a comment and I will do my best to help you.  This pattern fits on my large 6 month old but for an average size baby I would say this is a size 9-12 months.  Using a smaller crochet hook will result in a smaller bonnet.

The materials needed are about 2 ounces of main color worsted weight yarn, scraps yarn for the flower center and petals, a size H crochet hook, a blunt tapestry needle for weaving in ends and scissors.

To make the flower center:

Foundation : ch 3, sl st in 3rd ch from hook to form a ring

Round 1: ch 3, 7 dc into the ring, sl st to top of beginning ch 3 to join, fasten off

To make the petals:

Round 2: Join petal color to any stitch of the flower center, ch 3 (this acts as dc here and throughout), 1 tr, then 1 dc in the same stitch, *dc, tr, dc (petal cluster made) in the next stitch repeat from * around, sl st to top of beginning stitch to join, fasten off. You should have 8 petals.

With main color:
Round 3: Join main color to the space between any two petals, ch 3, dc, ch 1 2 dc in same stitch, *2dc, ch1 2dc (split cluster made) in next space between petals, repeat from * around, sl st to top of beginning stitch to join. You should have 8 split clusters.

Row 1: Sl st in next st and into the ch 1 space of split cluster, ch 3, 2 dc in same space, *3dc in next space, (the space may be between two clusters or the ch 1 space within the cluster), repeat from * around. You should have 16 clusters. Do not join the round.
Row 2: Ch 3, turn the work, skip the first cluster and *3 dc in next space between clusters, repeat from * around. Place 1 dc in the top of the last stitch. You will have 15 clusters.
Row 3: Ch 3, turn, 2 dc in the first space (ch 3 + 2dc make the first cluster), *3 dc in next space between clusters, repeat from * around to the last space. You will have 16 clusters.
Repeat rows 2 & 3 6 more times for a total of 15 rows.


Finishing: ch 1 to ease around the corner, sc evenly around the lower edge placing 2 sc in the end of each row. At the 4th row from the front edge you will place 1 sc, then ch 45, then skip the first ch from the hook and sl st into each chain back up to the bonnet (tie made), then place the 2nd sc into the 4th row and continue the sc border. Once you reach the center back you will skip the 2 slip stitches of round 3 and continue the sc border down the other side. Once you come to the 4th row from the front edge make the second tie in the same way as previously described. Once the tie is made you will continue the sc border in the last 3 rows to the front edge. Ch 1 to ease around the corner then place *1 sc in each of the first 2 dc then 1 sc into the space between the clusters, repeat all the way across the front edge. Fasten off, weave in ends.


Please link back to this original pattern when sharing.


Submitted to Hookin on Hump Day on Moogly
Submitted to Link & Share Wednesday Party at Oombawka Design Crochet
Submitted to Craft Frenzy Friday
Submitted to Hookin On Hump Day on Moogly 


See some of my other patterns
Football Coaster

Friday, February 21, 2014

Tetracuspid Hypocycloid Crochet Pattern

This pattern makes tetracuspid hypocycloids.  Ah, What?!  You know the little star-like symbols on the Pittsburgh Steelers logo?  Those are tetracuspids hypocycloids, also known as astroids, also known as paracycles, also known as those little colored stars on the Pittsburgh Steelers logo.  There is even a mathematical calculation to that funny little shape.  Alas, you are not here for me to explain mathematics, you are here for crochet patterns.

This pattern can used to make appliques to add to another project but what I have in mind is for these to be a set of coasters.  I made these in the Pittsburgh Steelers logo colors but these could be made in any color.  You need something to set your Yuengling down on when you are watching football, right?


This pattern uses US crochet terms.  I used worsted weight yarn and size G crochet hook.   If you have any questions about this pattern, leave me a comment and I will do my best to help.


Tetracuspid Hypocycloid Pattern

For this pattern cluster = [sc, hdc, dc, ch1, dc, hdc, sc]
  1. Ch 3 , sl st in 3rd ch from hook to form a ring
  2. ch 2, 12 hdc in ring, sl st to top of beginning ch 2 to join
  3. ch 2, 1hdc in the first st, 2 hdc in the next 11 st around, sl st to top of beginning ch to join
  4. ch 1, *skip 1 st, cluster in the next st, skip 1 st, 1 sc in next 3 st,  repeat from * 3 more times, sl st to beginning ch1 to join.
  5. Ch1, *skip 1 st sc2tog, cluster in next ch 1 space, sc2tog [see note], skip 1 st, 1 sc in next 3 st, repeat from * 3 more times, sl st to beginning ch1 to join
  6. ch 1, skip 1 st, 1 sc, *sc2tog,  cluster in ch 1 space, sc2tog, 1 sc, skip 1 st, 1 sc in next 3 st, skip 1 st, repeat from * 3 more times, sl st to beginning ch1 to join.
  7. Weave in ends and block lightly with steam iron,
     [note] Since the cluster is so many stitches in a single stitch it will most likely be covering the first stitch of the sc2tog.  Be sure to pull the cluster back to expose that hidden stitch.

    Feel free to make this pattern for yourself or as a gift, please link to the original pattern when sharing.


[pattern edited 8/19/15]

Bass Clef Applique Pattern

Looking for a crocheted bass clef pattern?  Look no further.  This pattern uses US crochet terms.  I used worsted weight yarn and size G crochet hook.


  1. ch 2 , turn, 8 sc in 2nd ch from hook
  2. ch 11, turn
  3. skip 1st chain from hook, sl st in next 4 ch, 1 sc in next ch, 2 sc in next ch, 2 hdc in next 4 ch, sl st to join disc made in step 1. weave in ends.

for the spots


  1. ch 2 turn
  2. 4 sc in 2nd ch from hook, sl st to first sc to join. weave in ends or use them to attach the spots to your finished project.
enjoy.

Are you looking for a pattern for something specific?  I'm always open to requests.  Leave me a comment and I will see what I can whip up!


Thursday, February 20, 2014

Leprechaun or Pilgrim Hat Coaster Pattern

Make this coaster in green for a St Patrick's day leprechaun hat or make it in black for a pilgrim hat for thanksgiving.  This pattern uses only single crochet and chain but because the band and buckle are done in tapestry crochet I would say this is an advanced beginner pattern.


Tapestry crochet is done by carrying 2 or more colors of yarn along the work as you go.  You pick up and drop the yarn you need but the stitch is only made in one color at a time.  It can easily become a tangled mess so I suggest using small segments of each color.

To get a nice clean design you have to keep an even tension which can be hard when you are switching between colors.  It can take some practice.  Tapestry crochet can be very detailed but the tapestry crochet in this pattern is very minor.  It would be a good project for anyone new to tapestry crochet.

When switching colors its best to yarn over and pull through with the new color on the stitch before the color change.  It's also best if you can pick one side to be the "wrong" side and always carry your yarn on that side.  As you turn your work the "wrong" side may be facing you or facing away from you.  A final tip I have for you regarding tapestry crochet is to leave long tails.  When you weave these tails into your work you can sometimes use them to cover areas where the hidden color is showing a bit.

This pattern uses US crochet terms.  The band and buckle on this pattern are done using tapestry crochet.  It may be worthwhile to find a tapestry crochet tutorial before attempting this pattern.  You could also make this pattern with just the band and add a buckle made from felt.  I used worsted weight yarn and a size G hook.  You will also need a blunt tapestry needle to weave in ends.


Leprechaun/Pilgrim Hat Coaster Pattern
  1.  with main color: ch 21
  2. turn, skip 1 ch and sc in each ch across, ch 1 turn
  3. 1 sc in each sc across, ch 1 turn
  4. 1 sc in each of the next 6 sc, join buckle color, carry main color and work in buckle color, 1 sc in next 8 sc, drop buckle color, work in main color, 1 sc in each of the next 6 sc, fasten off main color, turn.
  5. skip 3 sc, join band color in next sc, 1 sc in next 3 sc, carry band color, pick up and work in buckle color, 1 sc in next 8 sc ,drop buckle color and work in band color, 1 sc in next 3 sc, ch 1 turn
  6.  1 sc in next 3 sc, carry band color and pick up and work in buckle color, 1 sc in next 2 sc, carry buckle color and work in band color, 1 sc in next 4 sc, carry band color and work in buckle color, 1 sc in next 2 sc, drop buckle color and work in band color, 1 sc in next 3 sc, ch 1 turn
  7. repeat row 6, fasten off band color
  8. rejoin main hat color, 1 sc in next 6 sc, carry main color, pick up and work in buckle color, 1 sc in next 8 sc, drop buckle color, work in main color, 1 sc in next 6 sc, ch 1, turn
  9. 1 sc in each st across
  10. row 10-16, repeat row 
To finish, sc around outer edge placing 1 sc in each st or end of each row.  Place 1 ch in each outside corner to ease around corners.  Weave in ends.  Block lightly with a steam iron.


Please link to this original pattern when sharing.


Check out some of my other patterns
Football Coaster

    Moogly HOHD
    Read more at http://www.mooglyblog.com/moogly-buttons-and-extras/#lQYbrwAIr1qFjuwl.99

Wednesday, February 19, 2014

Sand Dollar Coaster Pattern

I have another coaster pattern.  This one was made in buff colored yarn and the design sort of reminds me of a sand dollar.  As much as I love multi-colored motif coasters, using 1 color means the stitches themselves take center stage.  It also means less ends to weave in at the end. :)

This pattern uses US crochet terms.  I used worsted weight cotton yarn and a size H hook but a similar sized hook can be used.

If you have any questions about this pattern, leave a comment and I will do my best to help you out.

  1. Ch 3, sl st into 3rd ch from hook to form a ring
  2. ch 1, 11 hdc in ring, sl st into first hdc to join
  3. ch 2, 2dc in same st, *skip 1 st, 3dc in next st, repeat from * 4 more times, sl st into beginning dc to join
  4. sl st in next dc, sl st into space between clusters, ch 2, 2hdc in same space, *1 hdc in each of the next 2 dc, 3 hdc in space between clusters, repeat from * 4 more times, 1 hdc in each of the next 2 sl st, sl st into beginning hdc to join
  5. *ch 6, skip 4 hdc, 1 sc in next hdc, repeat from * 4 more times, ch 6, sl st into last st of row 4
  6. *12 sc in ch 6 space, repeat from * 5 more times, sl st into beginning sc, fasten off, weave ends.


    Feel free to make this pattern for yourself, as a gift or to sell but please link to the original pattern when sharing.

    Check out some of my other patterns
    Football Coaster

Tuesday, February 18, 2014

Dirty Rice - Freezer Cooking Recipe

I love dirty rice. It's a true comfort food. Warm and spicy, perfect on these cold winter days. When you have the time, there is nothing better than a simmering pot on the stove filling your house with the delicious aroma.

 Make a double or triple batch and freeze it for when time is short. You can freeze this once its completely finished for a heat & eat meal or stop just before adding the rice. Then you when you are ready to eat just add the rice and a cup of water to the prepared base and simmer until the rice is done.

This is the kind of recipe that works great for batch cooking.  The peppers, onion and celery give this dish a rich flavor but it takes some time to chop all those vegetables. You can chop the vegetables for three batches in just about the same amount of time as for one batch. The simmering takes some times too. So you might as well simmer 3 batches all at once. In the end you have dinner for tonight and 2 in the freezer for later.

Ingredients (4 servings):
1 pound ground beef
1 cup uncooked brown rice
1 large onion, chopped
1 green bell pepper, chopped
1 red bell pepper, chopped
2 stalks of celery with leaves, chopped
3 cloves of garlic, mined
1 TBSP worcestershire sauce
1 cup homemade chicken stock or beef stock
2 TSP bacon fat or vegetable oil
salt and pepper
cayenne pepper powder (to taste)

Heat the bacon fat in a cast iron dutch over or other large pot.  Season the ground beef with salt and pepper and fry in the fat for about 5 minutes until it is mostly cooked.  As you are frying, break the beef up into small pieces.

Add the vegetables and stir to combine.  Cook on medium for about 10 minutes until the vegetables are softened.

Stir in the chicken stock and worcestershire sauce.  You can stop at this point, cool, and freeze the base.  To continue the recipe add 1 cup uncooked rice and 1 cup water and simmer at medium heat for 20 -30 minutes until the rice is tender and the liquid is absorbed.

Garnish with fresh parsley and Louisiana style hot sauce.

**To continue this recipe from the freezer, add the uncooked rice and water to the thawed base and simmer until the rice is tender and everything is warmed through.  If needed you can use the base directly from the freezer but it may take a bit longer to cook.


This recipe was submitted to the MaMade Blog Hop 

Monday, February 17, 2014

Creamy Peanut Butter Pie with Oreo Crust (Dairy-Free)

This no bake peanut butter pie is incredibly easy.  Dangerously easy.  There is little keeping you from making it three times a week.  It's rich, creamy and oh so peanut buttery.  Oh yes, you need this in your life.


This recipe uses tofu.  It may surprise you but soft and silken tofu are used in lots of desserts and smoothies.  Tofu on its own doesn't taste like much of anything, all you taste is the peanut butter.

It's becoming easier to find tofu.  It is sold in nearly all supermarkets.  Tofu usually comes in blocks packed in water.  Sometimes soft tofu comes in a plastic tube.  Either will work but be sure to drain the tofu if it's packed in water.  Most often tofu is labeled as extra firm, firm, soft, or silken.  Soft or silken is what you want for this recipe.

I made the crust following the Oreo Crust Recipe from Oreo's website but I replaced the butter in the recipe with dairy free margarine.  You may use a store bought cookie crumb crust but be sure to check the label if you need this to be dairy free.  A graham cracker crust also works well.

For the crust:
18 Oreo chocolate sandwich cookies
3 TBSP dairy free margarine, melted

To make the crust grind the cookies in a food processor until they are fine crumbs.  Add the melted margarine and pulse a few times to combine.  Press the moist cookie crumbs into the bottom and size of a 9 inch pie plate.

For the filling:
1 16-18 ounce block of soft or silken tofu
1 cup of creamy peanut butter
1/2 cup of granulated sugar

To make the filling blend the tofu, peanut butter and sugar in the food processor.  Blend for 1-2 minutes, scrap down the side of the food processor, and blend for another 1-2 minutes until you have a thick creamy mixture.

Pour the filling into the crust and allow it to chill for 4-6 hours.


Tomato Butternut Squash Soup

Are you looking for a great tomato soup recipe?  This rich and creamy tomato butternut squash soup really hits the spot!  Make a large batch and stock up your freezer.

Ingredients: 
1 small butternut squash, peeled, seeded and cubed
2 (28 ounce) cans of diced tomatoes
1 quart of chicken or vegetable stock **
2 fresh sage leaves or 1/2 tsp dried sage


Combine all the ingredients in a large pot and simmer 25-30 minutes until the squash is tender.  Puree with an immersion blender or in a blender until smooth.  Serve with garlic bread.

**Store bought chicken stocks and broths often have dairy ingredients.  Use homemade stock or check the label carefully.

Freezer Cooking Storage

Food in the freezer is an investment.  You put the time, effort and money into making your freezer meals and you want to protect that investment.  Some things are perfectly fine stored in reused yogurt containers but other things do best in freezer bags or vacuum sealed bags.  Lets look as all the ways you can store your freezer cooking

 No Container

Storing food in the freezer without any wrapping or container not recommended.  Foods can dry out, absorb odors and become freezer burnt.  Flash freezing can be done without any covering but you will want to be sure to transfer the food to an appropriate container as soon as its becomes firm.  You can flash freeze by placing the food on a silicone mat lined cookie sheet or in ice cube trays.

Freezer Paper, Aluminum foil

Freezer paper or aluminum foil usually won't provide much protection but they work well when you want to individually wrap items or keep items separated.  A small square of freezer paper between hamburger patties will keep them from sticking together so you can remove just what you need from the freezer without thawing the entire package.  Aluminum foil is also useful for odd shaped items that don't fit easily in another container, like breakfast burritos.  If possible add another layer of protection, such as a freezer bag.

Zipper Bags

Some people exclusively freeze in zipper bags.  They are cheap, disposable and can be frozen flat to save freezer space.  Zipper bags are also great if you need to get into a bag over and over.  Choose freezer bags over thinner storage zipper bags.  Zipper bags won't provide much protection and should be only used for short term storage.  I love keeping cookie dough balls in zipper bags.  Take out a few at a time to bake fresh cookies without being tempted by an entire batch.  Thaw in the fridge overnight or remove the food and warm in another container.

Plastic Containers

You can re-use plastic food containers like yogurt or margarine tubs or buy containers.  Glad Ware or Ziploc type containers come in lots of sizes and shapes to fit your needs.  Freezing can cause the plastic to become brittle and break.  There are food containers specifically made for freezing which won't break as easily.  Containers are great for soups or liquid foods that can be hard to pour into a freezer bag.  Make sure you do not heat foods in the container unless they are made to go into the microwave.

Glass Jars

I love the idea of freezing in glass jars but if you have to do it properly.  Expanding food can break glass jars and because there could be shards of glass in the food, you will have to throw the food away.  Even heavy duty mason jars meant for pressure canning can break in the freezer.    If the jar has shoulders or tapers, it is not appropriate for freezing.  Only freeze in jars that have straight sides like half pint or wide mouth pint jars.  The small size of these jars means they won't work for most thing.  I do love using wide mouth pint jars to store raw ground beef.  One pound of ground meat fits perfectly in wide mouth pint jars.  It's a tight fit but less air space means less freezer burn.  Thaw in the fridge overnight or place the jar in cold water to thaw.  You can reheat food directly in the glass jar if the food is thawed.  Do not heat in glass if the food is still frozen, it could cause the glass to break.

Vacuum Sealed Bags

You should consider investing in a vacuum sealing system if you want the best protection from freezer burn.  Food Saver is the brand I use.  The bags can be pricey so I use them for long term storage or for things that have no better alternative.  The bags can be washed and reused but I wouldn't if the bag was used for raw meat.  You can find good deals on rolls of off-brand vacuum bags online which work just as well.  Most vacuum sealing bags are microwave safe.  To reheat the food cut a vent in the bag and heat in the microwave or place the bag in a pan of simmering water.


No matter which way you chose to store your frozen foods, make sure you clearly label and date everything.  Add reheating instructions and last minute additions so you won't be guessing come dinner time.


Freezer Cooking (Batch vs Bulk vs OAMC)

Freezer cooking is an umbrella term to mean any meal prep done ahead of time and frozen.  There are different ways to freezer cook and there are pro and cons of each.  Let's look closer at each style to see which might be the best fit for you.

Once A Month Cooking

Once a month cooking (OAMC) is preparing or mostly preparing an entire months worth of meals in one day.  The cooking day is usually very long, must be thoroughly organized and works best if you have helpers.  Most OAMC recipes are not actually cooked on cooking day but prepared and portioned out for quick cooking when they are needed.

Batch Cooking

Batch cooking is when you make a double, triple or even quadruple batch of a recipe.  This can be a large scale or small scale process.  Making a big pot of soup and freezing portions is an excellent way to ease into freezer cooking.  

Bulk Cooking

Bulk cooking is when you make large portions of meal components.  Roast several chickens and use the meat for chicken salad, chicken soup, chicken and dumplings, or chicken club wraps.  Ground beef seasoned with Mexican flavors can be used for tacos, burritos, taco salad, chili or casseroles. 


Freezer Cooking 101

It goes by many different names; bulk cooking, batch cooking, once a month cooking (OAMC), or freezer cooking. They have slight variations but the basic concept is doing meal prep ahead of time to make dinner time less hectic.

Freezer cooking has helped me during so many stages of my life. I have dietary restrictions which makes it hard to eat at restaurants, or use convenience foods or prepared foods. I have to read every ingredient, grill the wait staff, and hope there was no cross contamination. I only truly feel comfortable eating food I have prepared myself. Good thing for me, I love to cook!

Like everyone else, my life gets busy and setting aside an hour each evening to prepare a wholesome meal can be hard. Freezer cooking helped when I was single and cooking for one, when I was in school and limited by the options in the cafeteria, when I was working 12 hour days, and when I had a baby. I have learned a lot over the years and I want to share my knowledge with you.

Before we get started, lets explore the benefits of freezer cooking.
  • Saves time
    • For most recipe it takes just about the same amount of time to make a double or triple batch as it does to make a single batch. Knock out the time consuming prep when you have the time, and reap the benefits when time is short.
  • Saves money
    • Take advantage of sales and in season prices. Get the best prices by buying in bulk. Then turn those great deals into great meals or meal components with a locked in price.
  • Makes dinner time less hectic
    • Who wouldn't love to come home from work and have dinner already made? Who wouldn't also love most of the dishes from that meal already washed?
  • Adapts to complicated diets
    • When you have special dietary concerns it can be hard to just grab something. There are freezer recipes for all sorts of diets including vegetarian, paleo, gluten free, food allergies, etc.
  • More wholesome
    • Not all freezer recipes are healthy but homemade foods are generally more wholesome than packaged foods or fast food.


Does this sound good? Would you like to try freezer cooking? Check out my freezer cooking resources to learn more.

The Basics of Freezer Cooking
Batch vs Bulk vs OAMC
Storage 


Freezer Recipes
Tomato Butternut Squash Soup
Dirty Rice
Honey Glazed Tarragon Chicken
Sloppy Joes
Breakfast Burritos

Saturday, February 15, 2014

Posey Coaster Pattern

This motif pattern has a sweet flower center.  Made up in cotton yarn, this beautiful motif becomes a coaster.  I made this one from blues and purple but any combination would look great.  You could make this pattern in a single color as well.  Make a single pattern or check out my other motif coasters (Clover Motif & Starburst Motif) to make a set.


This pattern uses US crochet terms.  If you have any questions, feel free to leave a comment and I'll do my best to help you out.

This motif uses scraps of worsted weight yarn and a size g crochet hook.  You can use any similar size of crochet hook.  You will also need a blunt tapestry needle to hide your ends.

Posey Motif/Coaster

  1. Ch 3, sl in in 3rd ch from hook to form a ring
  2. *Ch 4, sc in ring, repeat from * 4 more times
  3. ch 1*5sc in next ch 4 space, repeat from * 4 more times, sl st in beginning ch to join, fasten off
  4. Join color B to first sc of any loop from previous row, ch 1,*1 sc in next 5 st, ch 3, repeat from * 4 more times, sl st in beginning ch to join, fasten off
  5. Join color C to any ch 3 sp, ch 1, *3sc in ch 3 space, [1 dc, 3, ch 3, 1 dc] in 3rd sc of row 3, repeat from * 4 more times, sl st into beginning ch 1 to join, fasten off.
  6. Join color A to any ch 3 space, ch1, *5 sc in ch 3 space, skip 1 st, 5dc in center stitch of next 3sc cluster, repeat from * 4 more times, sl st to beginning ch to join, fasten off, weave in ends.
Feel free to make this pattern for yourself, as a gift, or to sell but please link to the original pattern when sharing.

Check out my other patterns
Football Coaster

Clover Coaster Motif Pattern

I have another crochet motif pattern for you.  Work these motifs in cotton yarn and they make excellent coasters or add a ornament hook or a loop of yarn and you have a festive holiday ornament.  I made this in shades of green to highlight the center 4 leaf clover design but it would look great in any color combination.
Clover Coaster 
This pattern uses US crochet terms.  Ch = chain; sc = single crochet; dc = double crochet; hdc = half double crochet; sl st = slip stitch;  If you have any questions, feel free to leave a comment and I will do my best to help you.

I used scraps of worsted weight cotton yarn and a size g crochet hook.  Any similar sized hook can be used.
Clover Coaster
  1. With color A: ch 3, sl st in 3rd ch from hook to form ring 
  2. *ch 4, sc in ring, repeat from * 3 more times 
  3. ch 1 *5 sc in ch 4 space, repeat from *3 more times, sl st in beginning ch 1 to join, fasten off
  4. Join color B in 3rd sc of any 5 sc segment, ch 1, 2 hdc in same st, *1 hdc in each of the next 4 sc, [2 hdc, ch1, 2 hdc] in next sc, repeat from * 3 more times, 1 hdc in next 4 sc, 2 hdc in beginning st, ch 1, sl st to beginning ch to join, fasten off.
  5. Join color A to any ch 1 space, ch 1, 2 sc in same space, *skip 3 st, 5dc in next st, skip 3 st, [2sc, ch1, 2sc] in next ch 1 space, repeat from * 2 more times, skip 3 st, 5dc in next st, skip 3 st, 2sc in beginning ch1 space, ch 1, sl st to beginning ch 1 to join, fasten off.
  6. Join color B to any ch 1 space, ch 1, 1 sc in same space, *5 dc in space between clusters, 1 s c in top of next cluster, repeat from * 6 more times, 5 dc between last 2 clusters, sl st to beginning ch to join. Fasten off. Weave in loose ends.

 Feel free to make this pattern for yourself, to give as a gift or to sell but please link to the original pattern when sharing.

Check out my other crochet patterns
Starburst Motif
Football Coaster

Friday, February 14, 2014

More Snack Boxes

Here are some more of my most recent snack boxes :)
Persimmon, Swiss cheese, cucumber, radish and hazelnuts

Cake, Ritz cracker, celery and cucumber, persimmon

oatmeal cookie, dried pineapple, Swiss cheese, carrots, and celery

Swiss cheese, carrots and celery, persimmon, granola bar, almonds


cucumber and radish slices, banana peanut butter roll ups, pecans, peanut butter fudge, goldfish

I make these snack boxes once a week, usually Fridays, to add to my husband's lunch.  Its a nice treat and they are fun to make.  Be on the lookout for tips and tutorials in the coming weeks if you would like to learn how to make snack boxes like these.

Click here to see more of my snack boxes

Thursday, February 13, 2014

Whole Wheat Soft Pretzels (Dairy-Free)

After a little tweaking I came up with a perfect whole wheat soft pretzel recipe.  These pretzels are soft and chewy, slightly sweet and completely delicious.  They are awesome served warm with spicy brown mustard.


I based the recipe on Alton Brown's recipe but I needed to make it dairy free and I wanted to make it whole wheat.  In my opinion, the egg wash is unnecessary and a silicone mat is a better option that greasing the pan.  Upping the yeast to a full tablespoon helps the whole wheat dough rise to its full potential.

 Below is the recipe as I made it.

1 1/2 cups warm water
1 T Sugar
2 t salt
1T yeast
2 1/2 cups whole wheat flour
2 cups all purpose flour
1/2 stick Earth Balance vegan margarine
10 cups water with 2/3 cup baking soda

Combine the 1 1/2 cup warm water, sugar, salt and yeast.  Stir to dissolve.  At this point you can proof the yeast.  If you know your yeast is viable (fresh and stored properly), you can skip this step, it will still work perfectly fine.

Add the melted and cooled Earth Balance.  Be sure your margarine is not too hot or it may kill your yeast.

Stir in the whole wheat flour and add enough of the all purpose flour to form a dough.  I start with the whole wheat flour, then add the all purpose flour.  The atmosphere and weather can affect how much flour you will ultimately need, and I want to make sure I will have the full amount of the whole wheat flour in my final product.

Knead the dough 8-10 minutes until it is smooth and elastic.  Place the dough in an oiled bowl and allow the dough to rise in a warm place for 1-2 hours or until doubled in size.  (see below for the best way I have found to proof the dough)

Punch down the dough and divide into 12-14 pieces.  Cover the dough with plastic wrap while you are working so that it doesn't dry out.  Roll the dough into long ropes and shape the pretzels.  Alternately, you can cut the rope into 2 inch segments to make pop-able pretzel nuggets.

Meanwhile, mix the 10 cups of water and baking soda in a wide shallow pan.  Make sure you add the baking soda before the water heats. If the water is hot when you add baking soda it will bubble over and make a big mess.  Once the baking soda is dissolved, bring it to a slow simmer.  Using a slotted spatula carefully lower the shaped pretzels into the simmering baking soda solution.  Only put 2-3 pretzels in at a time.

Remove the pretzels after about 30 seconds and transfer them to a baking sheet lined with a silicone mat or parchment paper.  While they are still damp, sprinkle each pretzel with pretzel salt.  Regular coarse salt can be used, but the crumbly pretzel salt really makes them awesome.

Bake in a oven preheated to 450 degrees (F) for about 10 minutes until they are dark brown all over.


Notes:
Proofing:
The best way I have found to proof yeast dough is in the microwave.  You don't heat the dough with the microwave, but you create a warm steamy environment.  Place 2 mugs of warm water in the microwave and cook them for 1-2 minutes until they are hot and steamy.  Place your bowl of dough in the microwave and quickly close the microwave door to prevent too much temperature loss.  The heat helps the dough rise and the steam keeps it from drying out or forming a skin.

Storage:
Store the baked pretzels in an airtight container in the refrigerator.  For pretzels you want to store, omit the pretzel salt sprinkled before baking, it will just melt off.  Add the salt before reheating (See reheating instructions below).

Reheating:
brush each pretzel with a scant amount of water then sprinkle the salt all over.  Warm the pretzel in the microwave for 15-20 seconds then toast them in a toaster oven.  It seems like a complicated reheating process but its the best way to get the crunchy outside and warm chewy inside.

Pretzel Dogs:
This is the best part of this post.  My reward for those of you that read all the way to the end.  These pretzels (or any soft pretzel recipe) wrapped around a hot dog make an amazing treat.  Simmer in the baking soda solution and bake as previously described.


Baseball Coaster Pattern

I start looking forward to spring training as soon as the Super Bowl is over.  Get excited for the MLB or little league season with this baseball coaster.  This simple round coaster, dressed up with red stitching, is a quick and easy to make.  Use it as a coaster, under mugs and glasses, or use it as an applique to dress up another project.

Baseball Coaster
This coaster is made with less that 1 ounce of white worsted weight yarn and scraps of red yarn.  You will need a blunt tapestry needle to weave in the ends and to embroider the accent stitches.  I used a size g hook but any similar sized hook can be used. 

This pattern uses US crochet terms

If you have any questions about this pattern, let me know in the comments, and I will do my best to help you out.

Foundation: ch 3, sl st in 3rd ch from hook to form a ring
Rnd 1: ch1 (counts as beginning sc here and throughout pattern), 7 sc in ring, sl st to join beginning sc
Rnd 2: ch 1, 2sc in each st around, sl st to join beginning 
Rnd 3 & 4: ch 1, *2sc, 1 sc* repeat from between (*) around, sl st to join beginning 
Rnd 4: ch 1, 1sc in each st around, sl st to join beginning 

Finishing: weave in ends, embroider red accent stitching

Feel free to make this pattern for yourself, to give as a gift or to sell but please link to my this original pattern when sharing.

Check out my other crochet patterns 


Wednesday, February 12, 2014

Starburst Motif Pattern


Starburst Motif
I made this star burst motif for a holiday ornament swap I participate in each year.  I love to use bright contrasting colors but this could also be made in more subdued colors or even a single color.  Add a hook or simply make a loop of yarn to hang the ornament.

Crocheted motifs make excellent Christmas tree ornaments because they are lightweight and won't shatter if when your cat knocks them to the floor.  Use them to decorate a wrapped present, a hostess gift or a plate of cookies.  String them together as a garland.  There are hundreds of way to use these motifs.


This pattern is a great way to use up scrap yarn.  You only need about 15 yards all together.  I used a size g hook but any similar sized hook will work.

If you have any questions, let me know in the comments and I'll do my best to help you.


Foundation: With color A, ch 3, sl st into 3rd ch from the hook to form a ring.
Rnd 1: ch 2, put 12 hdc into the ring, sl st to top of ch 2, fasten off
Rnd 2: join color B into any st, ch 4 (counts as beginning dc + ch 1), *1 dc in next st, ch 1* repeat between (*) 10 more times, sl st in 3rd chain in beginning dc, fasten off
Rnd 3: join color A to any ch 1 space, ch 2 (counts as beginning hdc), 1 hdc into same ch 1 space, ch 1, * 2hdc in the next ch 1 space, ch 1* repeats between (*) 10 more times,sl st to top of beginning ch, fasten off
Rnd 4: join color C in any ch 1 space, ch 6 (counts as beginning dc + ch3), dc in same space, *dc, ch3, dc, in next ch 1 space* repeats between (*) 10 more times,sl st into top of beginning dc, fasten off

Rnd 5: join color A in any ch 3 space, ch 1(counts as beginning sc), 4 sc in same ch 3 space, *5 sc in next ch 3 space* repeat between (*) 10 more times, sl st to beginning sc, fasten off, weave in all loose ends.

This pattern and video tutorial is my original creation, please link to the original pattern or video when sharing.

Check out a few of my other recent patterns
Football Coaster
Green Coaster
Home Brew Beer Coaster
Patriotic Top Hat

Conversation Heart Coaster Pattern

Surprise your sweetheart with a set of these sweet conversation heart coasters.  These coasters are perfect for Valentine's day or any time of the year.  Make a set with several different "sweet nothing" phrases embroidered on them.  Not feeling the love?  Change the phrases to "Bug Off" or Luv Stinks" for a sarcastic anti-Valentine's day coaster.

This pattern is made with less than 1 ounce of cotton worsted weight yarn such as Sugar'n Cream or Lion Brand kitchen cotton in pastel colors.  You will also need scraps of red yarn for the words.  I used a size g hook but you can use any similar sized hook.  To hide the ends and to embroider the words you will need a blunt tapestry needle.

If you have any questions about this patterns, feel free to post a comment and I will do my best to help you.

Row 1: Ch 2, turn
Row 2: 2 sc in 2nd ch from the hook, ch 1 turn (2)
Row 3: 1 hdc then 1 sc in first st, 1sc then 1 hdc in second st (4)
Row 4-8: Ch 2 turn, 1hdc then 1sc in first st, sc across to last stitch, place 1 sc then 1hdc in last st
Row 9-12: ch 2 turn, 1hdc in first st, 1 sc across increasing by 1 (inc made by placing 2 sc in the same st), 1 hdc in last st
Row 13: ch 1 turn, 1sc in each of the next 9 st, ch 1 turn (9)
Row 14 & 15: ch 1 turn, 1sc in each st across deceasing by 1 (dec made by sc2tog)
Row 16 & 17: ch 1 turn, sc2tog, 1sc in each st across to last 2 st, sc2tog in last 2 st
Row 18: ch 1 turn, skip first st, 1hdc in next st, sl in last sc.

For left side:
Reattach yarn at the center of row 12 and sc across. Continue rows 14-18


Finishing: sc around outer edge placing 1 sc in each st or end of each row. Embroider sweet nothings onto the center of the heart with red yarn and a tapestry needle.

Feel free to make this pattern for yourself, to give as a gift or to sell, but please link to the original pattern when sharing.

Check out my other coaster patterns

Football Coaster
Green Coaster
Home Brew Beer Coaster


Tuesday, February 11, 2014

Homebrew Beer Coaster

I have another coaster to share.  This time I had a special home brewer in mind.  This quick and easy coaster is made to look like a pint of beer with a thick foamy head.  If that wasn't inviting enough, the words "Have A Home Brew" remind us all to relax and enjoy a cold beverage.

These coasters can be made is any color of the beer rainbow from pale ale to malty stout.  You could embroider other words such as "Cheers" "Happy Hour" or you could also make them green for St Patricks day with the words "Kiss me".  If you want a kid friendly coaster, make it in a dark brown to resemble root beer or an eerie green color for a Halloween witch's brew.  The possibilities are endless.

This pattern uses US crochet terms.  sc = single crochet; ch = chain; yo = yarn over.
To make the puff stitch = Yo, insert hook into stitch, yo and pull up a loop, yo,insert hook into same stitch, yo and pull up a loop, yo and pull through all loops on the hook. 

Let me know in the comments if you have any questions and I'll do my best to help you.

This is made with worsted weight yarn, less than 1 ounce of main color and scraps of accent colors.  You will also need scissors and a tapestry needle to weave in ends and embroider the words.  I used size G crochet hook but a similar sized hook can be used.

Row 1; Ch 16
Row 2-18: ch 1 turn, 1 sc in each sc across
fasten off main color and join accent color. 
Row 19 & 20: ch 2, Puff stitch in each st across, turn
Border: sc around outer edge placing 1 sc in each st or end of each row.
To finish, embroider the words of your choice on the coaster using scrap yarn in a contrasting color.

Feel free to make this pattern for yourself, to give as a gift or to sell, but please link to the original pattern when sharing.

Check out my other patterns
Football Coaster
Green Coaster

Football Coaster

Here is a quick and easy pattern for a football coaster.  You can make them in brown and white for a classic football look or in your favorite teams colors.  Make a whole set for when your friends come over on Sunday afternoon to watch the game.


Coasters are a great stash buster and a quick project.  If you don't want to use these as coasters you could add a magnet for on the fridge or add a loop of yarn to make a Christmas tree ornament.  They can also be used as an applique to decorate another project.


This pattern uses US crochet terms.  sc = single crochet; hdc = half double crochet; ch = chain; yo = yarn over. Let me know in the comments if you have any questions and I'll do my best to help you.

This is made with worsted weight yarn, less than 1 ounce of main color and scraps of accent color.  You will also need scissors and a tapestry needle to weave in ends.  I used size G crochet hook but a similar sized hook can be used.

The number (#) at the end of each row is the number of stitches in that row.

Row 1: Ch2, turn, place 2 sc in beginning ch, ch1 turn
Row 2: 2 sc in each sc across (4)
row 3: ch1 turn, 2 sc in first sc, 1 sc in each of the next 2 sc, 2 sc in last sc (6)
Row 4: ch 1 turn, 2 sc in first sc, 1 sc in each of the next 4 sc, 2 sc in last sc (8)
Row 5: ch 1 turn, 2 sc in first sc, 1 sc in each of the next 6 sc, 2 sc in last sc (10)
Row 6: Join on white yarn, ch1 turn, 1 sc in each sc across (10)
Row 7: ch 1 turn, 1 sc in each sc across, fasten off white and rejoin brown (10)
Row 8: ch 2 turn, 1hdc in first sc, 1 sc in each of the next 3 sc, 2 sc in next sc (increase made), 1 sc in each of the next 4 sc, 1 hdc in last sc (11)
Row 9: ch2 turn, 1 hdc, sc in each sc across, 1 hdc in last stich (11)
Row 10: ch 2 turn, 1 hdc, 1 sc in next 4 sc, inc, 1 sc in next 4 sc, 1 hdc (12)
Row 11: repeat Row 9 (12)
Row 12: ch 2 turn, 1 hdc, 1 sc in next 4 sc, inc, 1sc in next 5 sc, 1hdc (13)
Row 13: repeat row 9 (13)
Row 14: ch 2 turn, 1 hdc, sc in next 4 sc, insert hook into next sc, yo and pull up a loop, insert hook into next sc, yo and pull up a loop, yo and pull through all loops on hook (dec made), sc in next 5 sc, 1 hdc (12)
Row 15: repeat row 9 (12)
Row 16: ch 2 turn, 1 hdc, 1 sc in next 4 sc, dec, 1 sc in next 4 sc, 1hdc (11)
Row 17: repeat row 9 (11)
Row 18: ch 2 turn, 1 hdc, 1 sc in next 3 sc dec, 1 sc in next 4 sc, 1 hdc (10)
Row 19 & 20: repeat rows 6 & 7 (10)
Row 21: ch 1 turn, dec, 1 sc in next 6 sc, dec (8)
Row 22: ch 1 turn, dec, 1 sc in next 4 sc, dec (6)
Row 23: ch 1 turn, dec, 1 sc in next 2 sc, dec (4)
Row 24: ch 1 turn, dec, dec (2)
Row 25: ch 1 turn, dec (1)

Finishing: sc around coaster putting 1 sc in the end of each row. Weave in ends. Stitch laces in the middle of the football.

Feel free to make this pattern for yourself, to give as a gift or to sell, but please link to the original pattern when sharing.

Check out my other coaster patterns
Conversation Heart Coaster
Green Coaster
Home Brew Beer Coaster

Monday, February 10, 2014

What are Bento Snack Boxes?

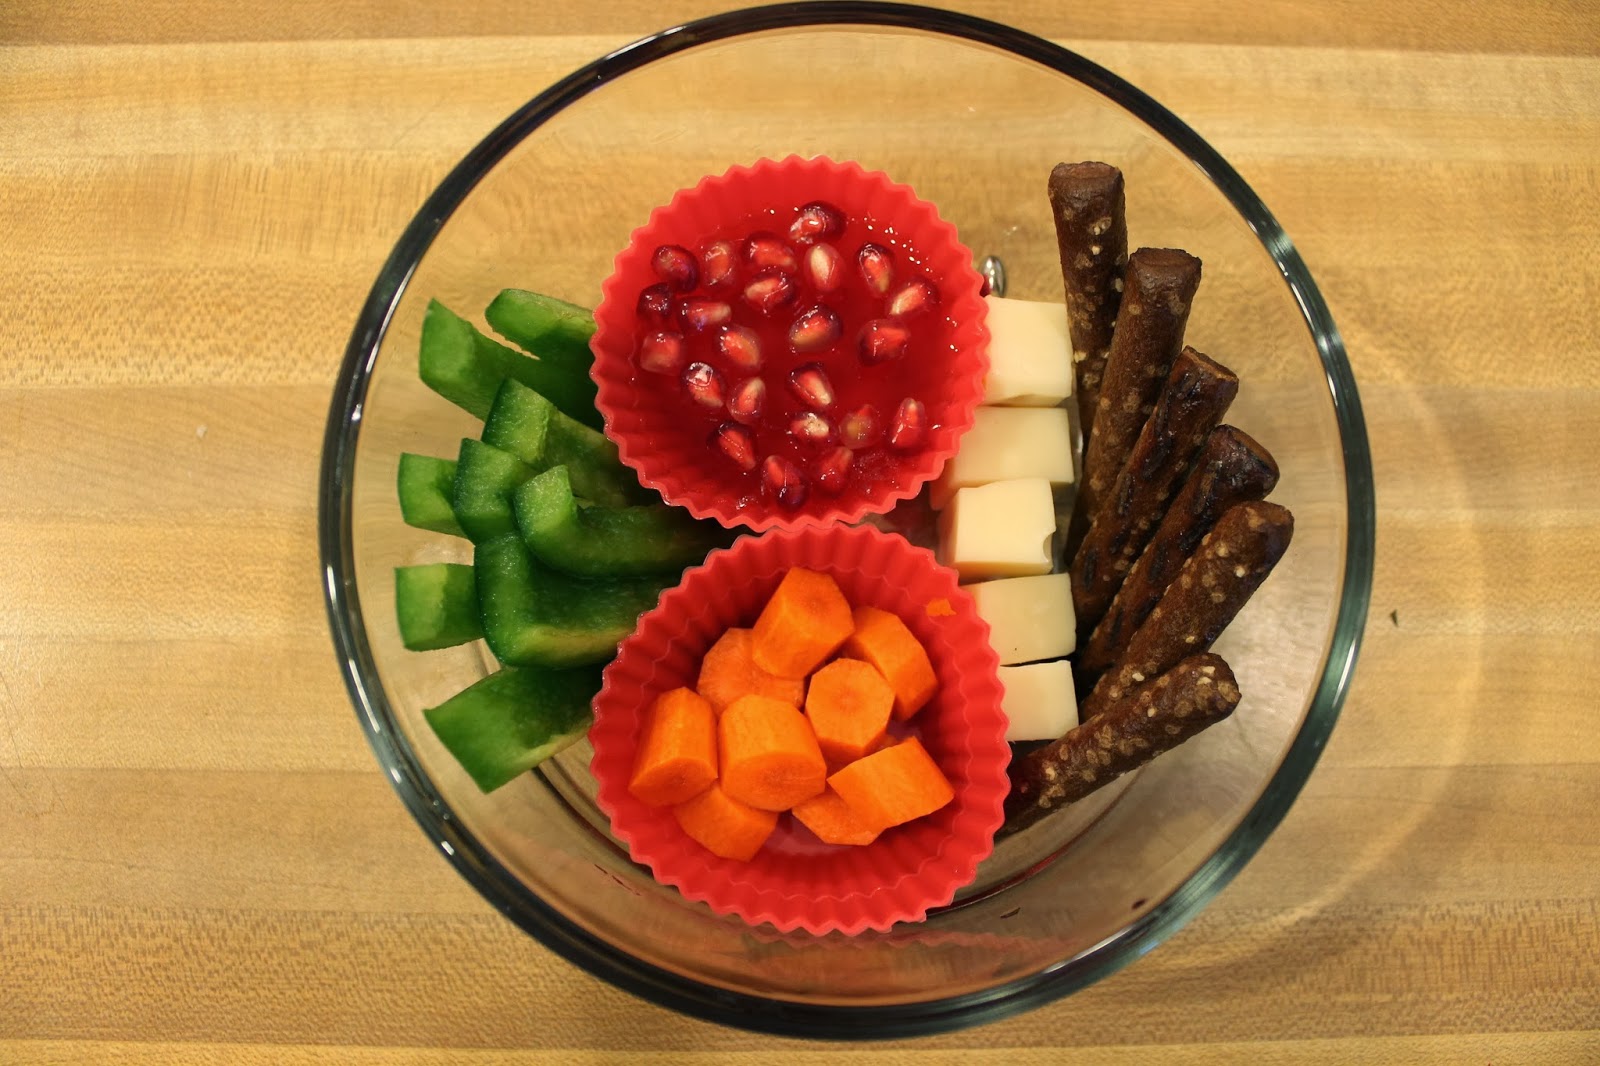
I call my snack boxes "bento" but they are not true bento boxes.  A bento is a popular boxed lunch in Japan.  They are usually made up of rice, seaweed, fish and vegetables.  The food is carefully tucked into the bento box in intricate and creative ways.  There are some amazing bentos out there.  I borrow inspiration and some techniques from these bento box lunches for my snack boxes.


My boxes are not complete lunches, they just serve as a snack or accompany a lunch.  The ingredients I use are decidedly western; usually a combination of fresh or dried fruits, vegetables, nuts, crackers, cheeses, cold meats, yogurt, dips and occasionally something sweet.  You could use anything you want but I generally try to stick with healthy foods.  I will occasionally dress up the boxes using bento accessories or making a themed box, usually I keep it simple.  Choosing vibrant colorful foods and arranging them neatly is the key to a beautiful snack box.


The boxes are fun to make and fun to eat.  Its a great way to add a variety of different tastes to a lunch without having to buy costly and wasteful individually packaged snacks.  The foods I use are usually nothing exciting, but when packed together you might find yourself looking forward to snack break even more than usual.


There are many different types of bento boxes to choose from.  Generally they are made from plastic or metal and they will often have cute cartoon characters or pictures on them.   You can buy bento boxes from Asian supermarkets or online.  I prefer to store food in glass whenever possible but any food safe container will work.  The majority of my snack boxes are in a 3 cup 7" x 5" glass food storage container by Pyrex.  I like the wide shallow container to arrange the food in.  You can also use round storage containers.

 You don't need a lot of trinkets or accessories but a few basic ones can help you build great snack boxes.  I use silicone cupcake liners to separate and corral foods.  I really love these flexible cups because they can squeeze between foods, can hold moist foods like yogurt or pudding, they are dishwasher safe and reusable.  To hold together firmer foods, like cheese cubes or grapes, you can use food picks.  Toothpicks, cocktail picks or even those funny plastic swords will work.  If you serve these boxes to younger children, avoid anything sharp or that they might choke on.

 click here to see more snack boxes.

Saturday, February 8, 2014

Sprouted Squash Seeds

Have you ever seen seeds that have sprouted inside of a vegetable?  This was a butternut squash.  How cool!

Friday, February 7, 2014

This weeks meals

I'm working on posting a weekly dinners video on YouTube.  I love watching these types of videos to get ideas for my own meal planning, new recipes, re-invented classics.  Here is a little teaser.
This is what we had Sunday.  Since it was Super Bowl Sunday I made a selection of party snacks.  My husband requested hot wings and I had wanted to make pretzel wrapped hot dogs for a while and now I had the perfect excuse.  Originally I was going to simply wrap the pretzel dough around the hot dog but after watching a video from Noreen's Kitchen I learned how to braid the hot dog into the pretzel.  Don't they look amazing?  Deviled eggs and some veggies round out the meal.  The game was a little underwhelming but dinner was excellent!

Wednesday, February 5, 2014

Crochet Baby Bibs

I completed several projects for my baby while I was still pregnant.  I had plans to make many more, of course, but its so hard  to anticipate the needs of a person you have yet to meet.  I made several hats only to discover that bonnets stay on better.  I made some booties that were too small for her long feet.  I made wool diaper soakers but never got around too using them before she outgrew them (oops!).  One of the things that I made that have been very useful are bibs.  I made a couple simple cotton bibs using this pattern and cotton yarn from my stash.  The yarn is mostly Sugar'n Cream and some Lion Brand Kitchen Cotton.  These bibs work perfectly for catching drool and keeping her clothes clean and dry.
These are a good size for her now, but it would be incredibly easy to make these larger or smaller by changing hook size or adding a couple extra stitches.  The patterns works up quickly and easily.  A great stash buster!

About Me

My photo
Welcome to my little corner of the web. I love to share things I make and ideas I have. I hope you enjoy!